-
Step 1: Confirm Component Availability and Compatibility
-
Step 2: Secure the Supply Chain—Fast
-
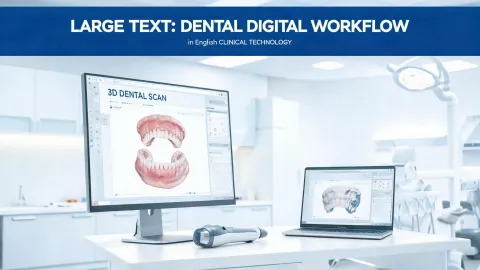
Step 3: Plan the Surgical Workflow with Digital Tools
-
Step 4: Verify Occlusion and Fit Pre-Surgically
-
Step 5: Document Everything—Especially the Deviations
-
Step 6: Follow Up Within 48 Hours
-
Common Mistakes in Emergency Straumann Cases
Everything I'd read about implant dentistry said premium systems always outperform budget options in every scenario. In practice, after 40+ rush cases with Straumann components, I've found something different: the system itself is table stakes—it's how you manage the process under pressure that determines whether the outcome protects or damages your brand reputation. That distinction matters more than most clinicians realize.
This checklist is for dental professionals who need to execute a Straumann implant case on a tight timeline—whether it's an emergency same-day load, a late-arriving component replacement, or a last-minute schedule change. It assumes you've already chosen the Straumann system; the focus here is on process quality when time is scarce.
I've organized this into 6 steps. Some you know. A couple you probably skip under pressure. Don't.
Step 1: Confirm Component Availability and Compatibility
This sounds obvious, but in rush mode, it's where mistakes happen. I learned this the hard way in March 2024: a clinic called at 4 PM needing a custom abutment for a Straumann BLT implant—next morning surgery. Standard turnaround for a milled TiBase abutment is 5 days. We had 14 hours.
Here's the checklist for this step:
- Implant platform: Confirm the exact Straumann platform (BLT, Standard Plus, or Tissue Level). The prosthetic components are not interchangeable between platforms.
- Healing protocol: SLActive or conventional? SLActive allows 3-4 week healing instead of 8-12 weeks—critical for emergency cases where timeline matters. But only if the surgical protocol matches.
- Abutment interface: Cross-check the TiBase dimensions (height, diameter, screw channel position). One millimeter off and the restoration doesn't seat.
- Kit inventory: Verify the surgical kit includes the correct drill sequence for that implant. The BLT kit, for example, has specific drills for each diameter.
(Mental note: I've started keeping a spreadsheet of Straumann part numbers and their compatible components. Saves about 30 minutes per rush order.)
Step 2: Secure the Supply Chain—Fast
When you need components same-day, standard distribution channels won't cut it. For the TiBase emergency I mentioned, we found a distributor with local inventory, paid a $120 rush fee (on top of the $480 base cost), and had it couriered by 7 AM. The client's alternative was a 3-week delay and a $12,000 case reschedule.
For shop straumann logistics in an emergency:
- Primary distributor: Call first, check physical inventory. Don't rely on website stock status—it lags.
- Local backup: Have 2-3 alternative suppliers who carry Straumann components. Pre-negotiate rush pickup terms.
- Direct from Straumann: For non-stock items, ask about emergency production (select Straumann facilities have rapid milling for TiBase and custom abutments—48 hour turnaround in some regions).
- Acceptable substitutes: Know which original Straumann components can be swapped (e.g., certain healing caps or cover screws) without compromising the case. Document the swap in the patient record.
Everything changed for me after that March 2024 case. We now maintain a small emergency inventory of common Straumann TiBase sizes in-house. The carrying cost is about $800/year. The cost of not having them: exponentially higher.
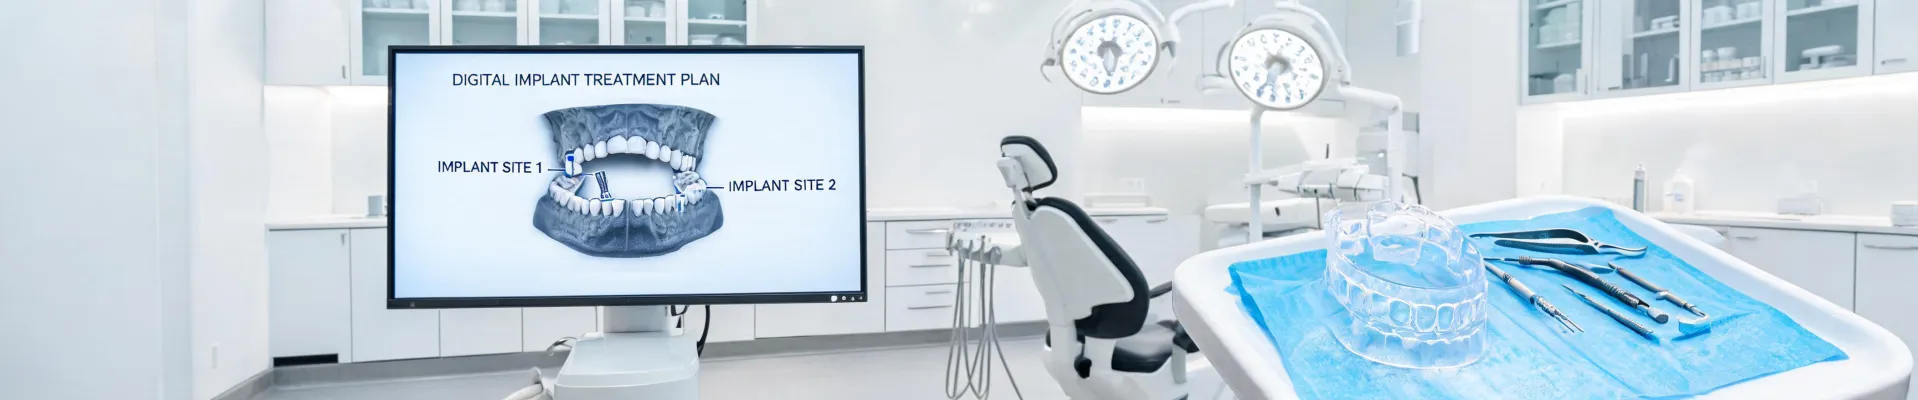
Step 3: Plan the Surgical Workflow with Digital Tools
In emergency cases, surgical precision and speed depend on planning. This is where digital tools earn their keep.
If you're using guided surgery—and I'd argue you should in any case where anatomy is tight—confirm these three things:
- CBCT-based planning: Verify the implant position, depth, and adjacent anatomy. For complex cases, a what is a pet scanner question sometimes comes up—PET scans can be useful for assessing bone quality or detecting subclinical infection in revision cases, though they're not standard for routine emergencies.
- Surgical guide design: Ensure the guide is manufactured and tested with the actual implant system. Straumann's coDiagnostiX software works directly with their implant library—reduces guesswork.
- Robot-assisted options: A surgical robot (like the Yomi or similar systems) can improve accuracy in full-arch or flapless emergencies, but only if the team is trained and the robot's workflow is pre-calibrated to the Straumann system. In a true emergency, adding an unfamiliar robot to the workflow usually creates more risk than it solves.
The conventional wisdom is to skip digital planning when time is short. My experience with 40+ rush cases suggests otherwise: a 30-minute digital check catches errors that cost 4 hours of chair time to fix later.
Step 4: Verify Occlusion and Fit Pre-Surgically
This is the step most often rushed in an emergency, and it's exactly where quality leaks out. The prosthesis must seat passively on the implant. Period.
Here's what I check:
- TiBase fit: The abutment should seat fully without resistance. If it doesn't, check for debris in the implant hex or a machined surface defect. I've seen 1 in about 200 TiBase components have a burr on the base—it's rare, but catastrophic if not caught.
- Screw torque: Use a calibrated torque wrench, not the handpiece. Straumann's recommended torque values vary by abutment type. Over-torque can strip the screw or fracture the implant.
- Occlusal verification: A pressure mapping system (like T-Scan or similar) can identify high spots that won't show on static articulation. In an emergency case where the antagonist is a natural tooth or existing restoration, premature contacts cause post-op pain and patient dissatisfaction—directly impacting your reputation.
It took me about 3 years and 150+ implant cases to understand that a 2-minute occlusion check at delivery prevents a 2-hour revision appointment and a patient complaint that reaches the referring dentist. The $50 cost of a pressure mapping session is trivial compared to the brand damage of a single failed restoration.
Details like this are what separate a clinic that looks professional from one that is professional.
Step 5: Document Everything—Especially the Deviations
Emergency cases almost always involve some deviation from standard protocol—different healing cap size, abbreviated curing time, alternative suture material. Those deviations matter later, for both clinical follow-up and liability.
What I document in every emergency case:
- Component lot numbers: Implant, TiBase, screw, healing cap. Photograph the packaging before opening.
- Trial and insertion torque: Primary stability value and final torque.
- Any substitution made: What was swapped, why, and who approved it.
- Post-op instructions: Specific to the patient's situation (e.g., extended healing time if SLActive wasn't used).
This isn't just CYA—it's the basis for follow-up care. When the patient returns in 3 months for the final restoration, the clinician needs to know exactly what's under the tissue.
Step 6: Follow Up Within 48 Hours
The case is seated. The patient is discharged. The referring dentist is informed. Most teams stop here. I don't.
A brief 48-hour follow-up call or message catches: post-operative pain that's beyond normal, occlusal discomfort (often indicates a contact that wasn't apparent under the rubber dam), and patient anxiety. Addressing these within 48 hours converts a routine follow-up into a brand-defining interaction.
When the patient tells their dentist, 'My implant doctor called to check on me the next day,' that builds referral loyalty that no marketing campaign can match. And for the referring practice, it confirms they made the right choice sending the case to you.
Common Mistakes in Emergency Straumann Cases
- Assuming component availability: Just because you ordered it doesn't mean it's in stock. Verify physical inventory before scheduling the surgery.
- Skipping surgical guide verification: A guide that fits on the model but not in the mouth costs more time than it saves. Always seat it on the patient before prepping the site.
- Using hand-tightened torque: Without a torque wrench, you're guessing. Under-torque causes screw loosening; over-torque can fracture components.
- Rushing the occlusion check: A single high spot on an implant crown transfers the full occlusal load to the implant-bone interface. In an emergency case where the patient is already compromised, that's a recipe for failure.
Bottom line: emergency work doesn't have to mean lower quality. In fact, because the stakes are higher—a rushed case that fails is harder to explain than a routine case that fails—the quality bar should be higher. The checklist above is what I use to make sure it stays there.